Integrate Zapier Using Webhooks in Lime Appointments
Setting Up A Webhook Trigger in Zapier
Step 1: Log in to your Zapier account or create an account on Zapier
Step 2: Create a New Zap
Once logged in, choose the Create Zap option in your Zapier Dashboard. You’ll be redirected to the Zap Editor screen. You’ll need to select the Webhook app as the trigger; this is what we’ll use to integrate with Zapier on our end.
A zap is an automated task that you want to run repeatedly between two online apps.
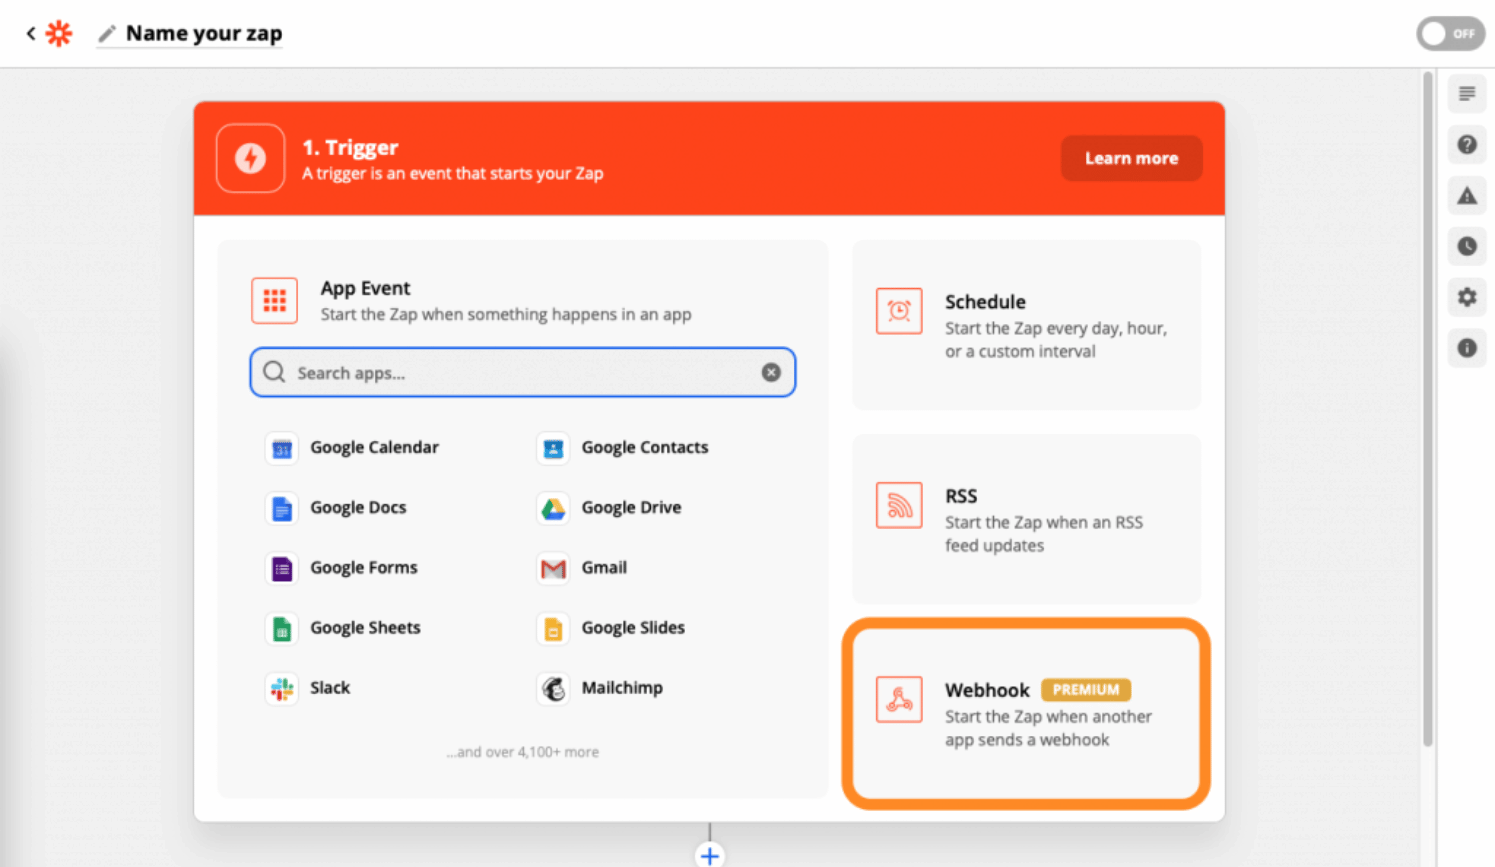
Webhook app being chosen as the trigger for the Zap
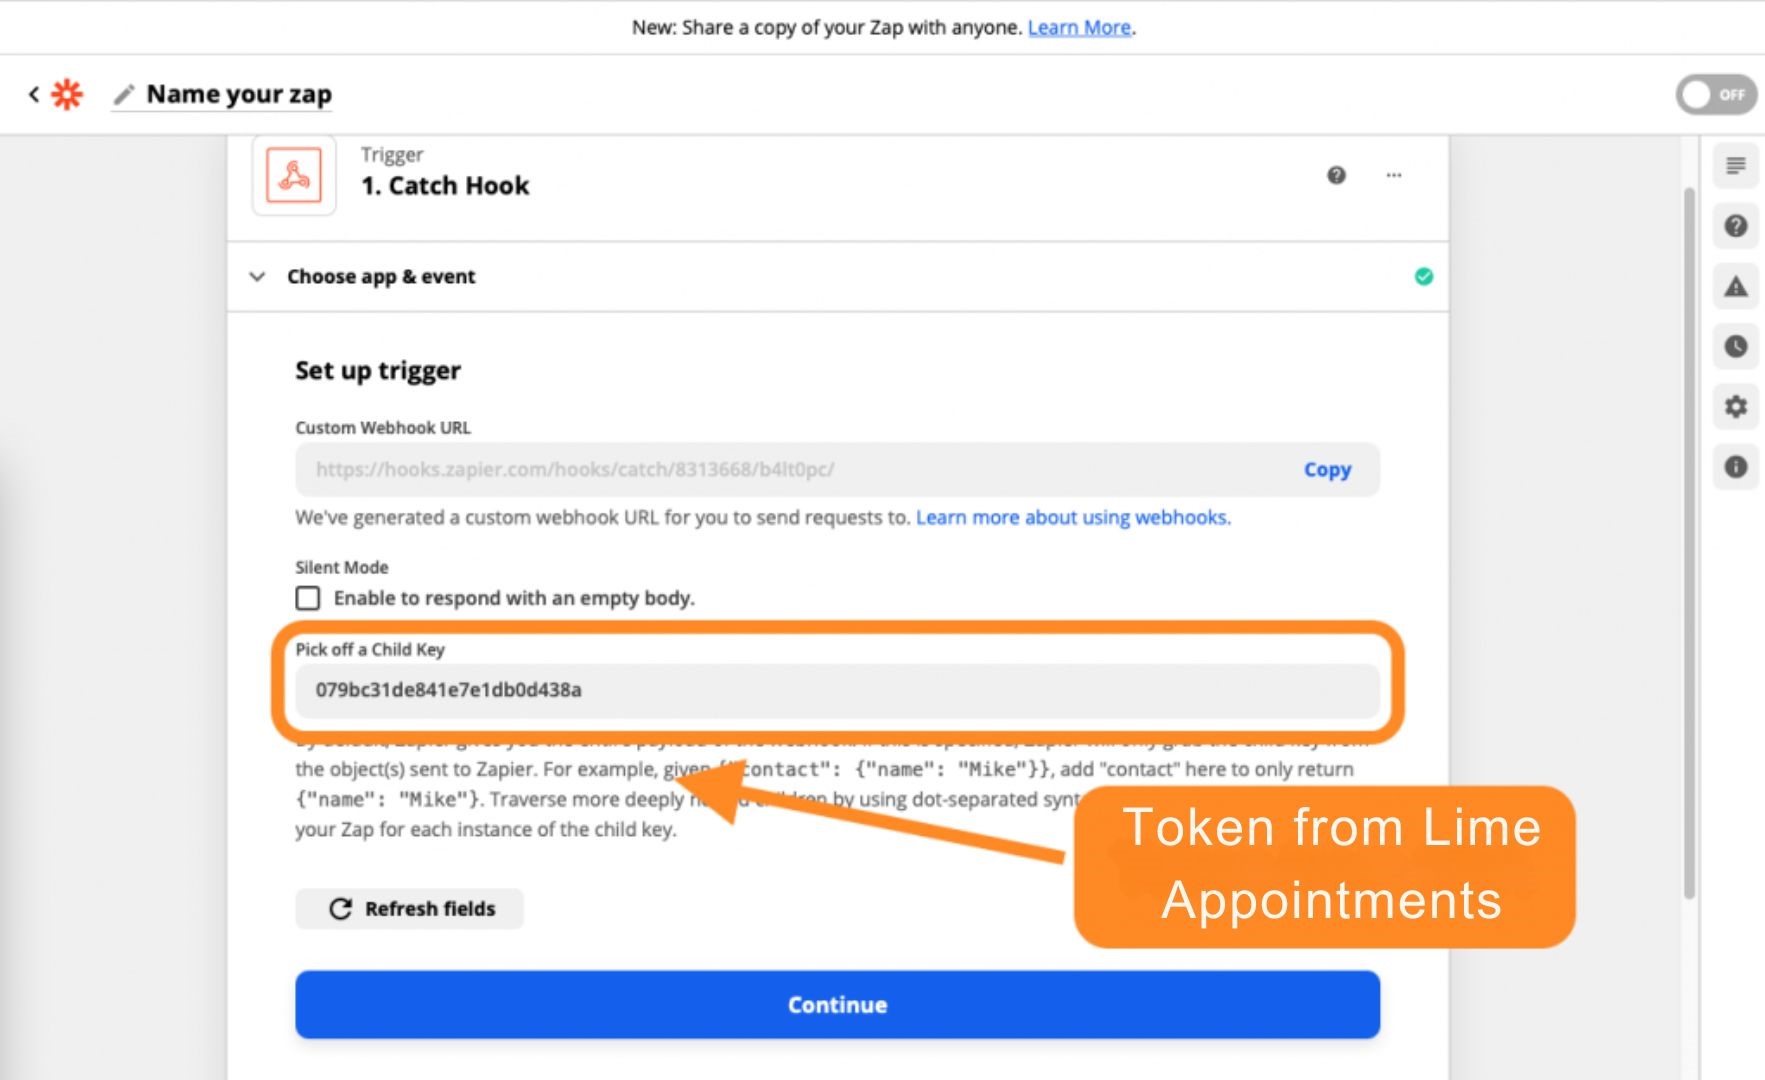
Step 3: Catch Hook Option for Webhooks
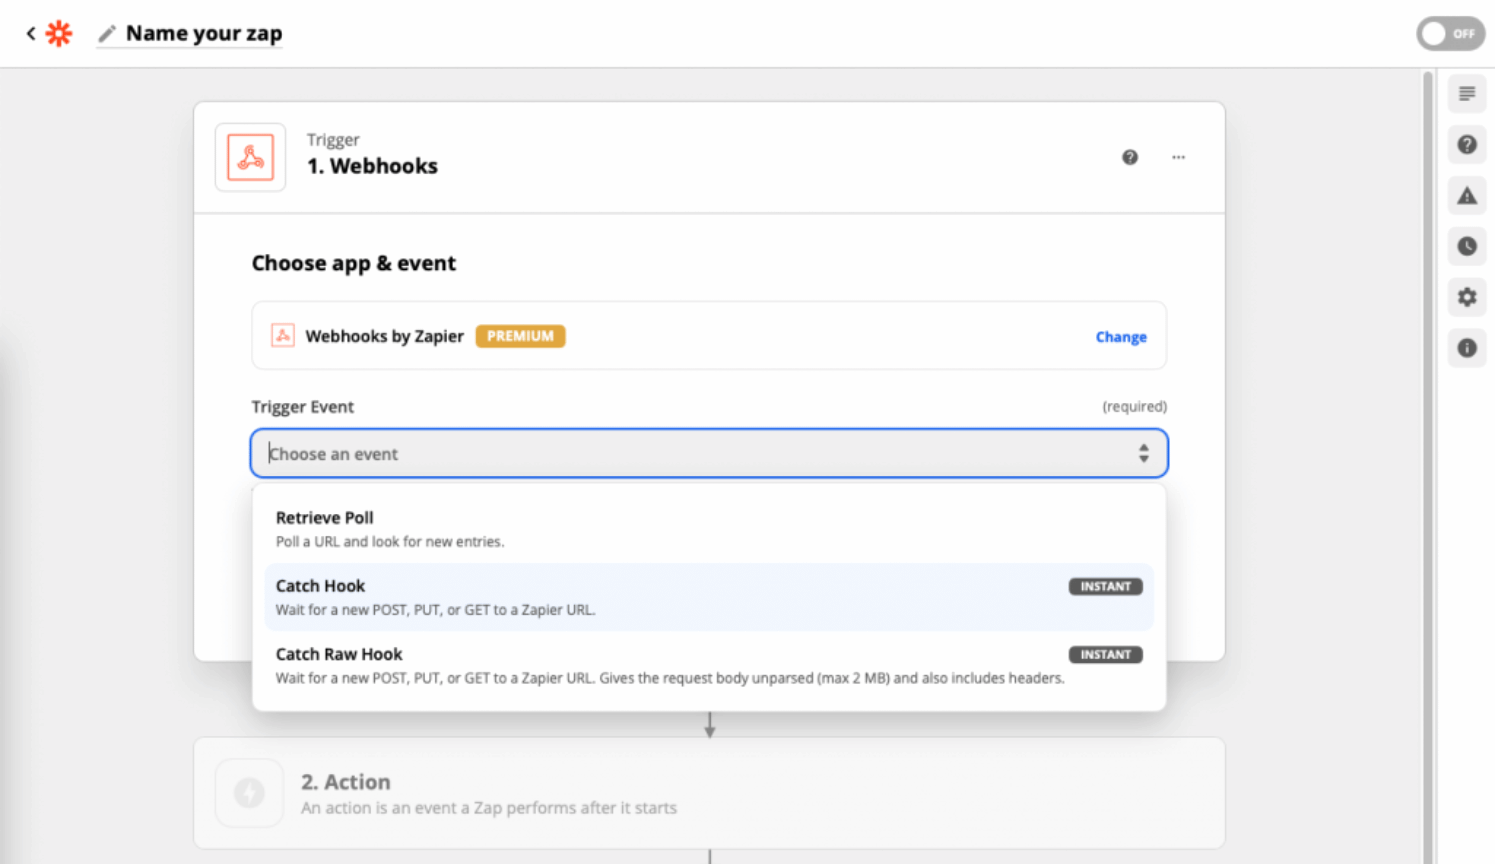
When it asks you to Choose App & Event, make sure to choose Catch Hook, this will allow us to receive the Appointment information automatically and organize the fields we pass to it.
Step 4: Customize the Hook for Webhooks
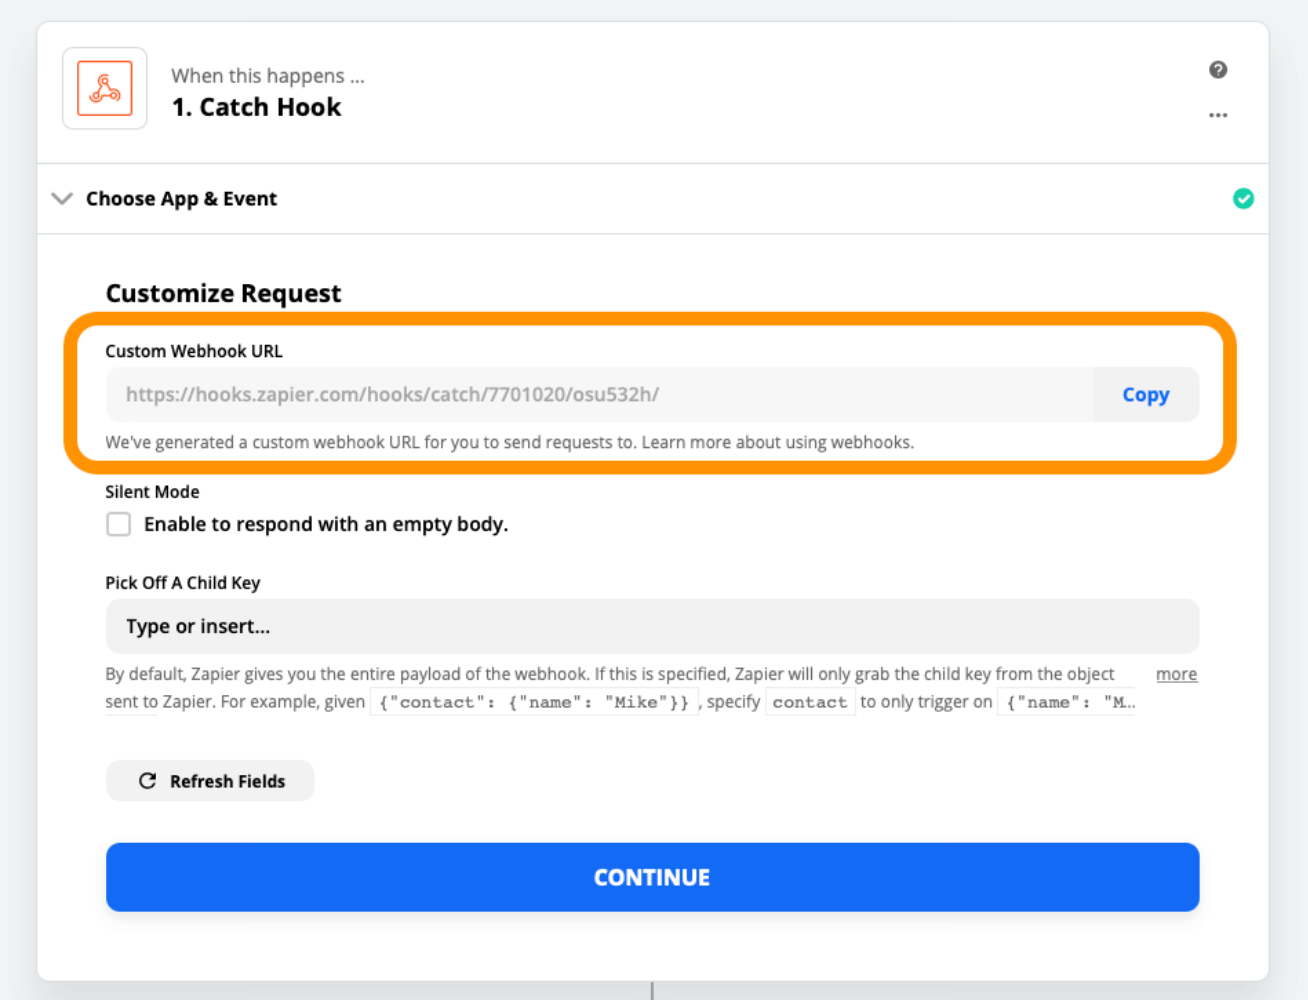
Copy the Custom Webhook URL so that we can paste this back into Lime Appointments.
Creating a New Webhook in Lime Appointments
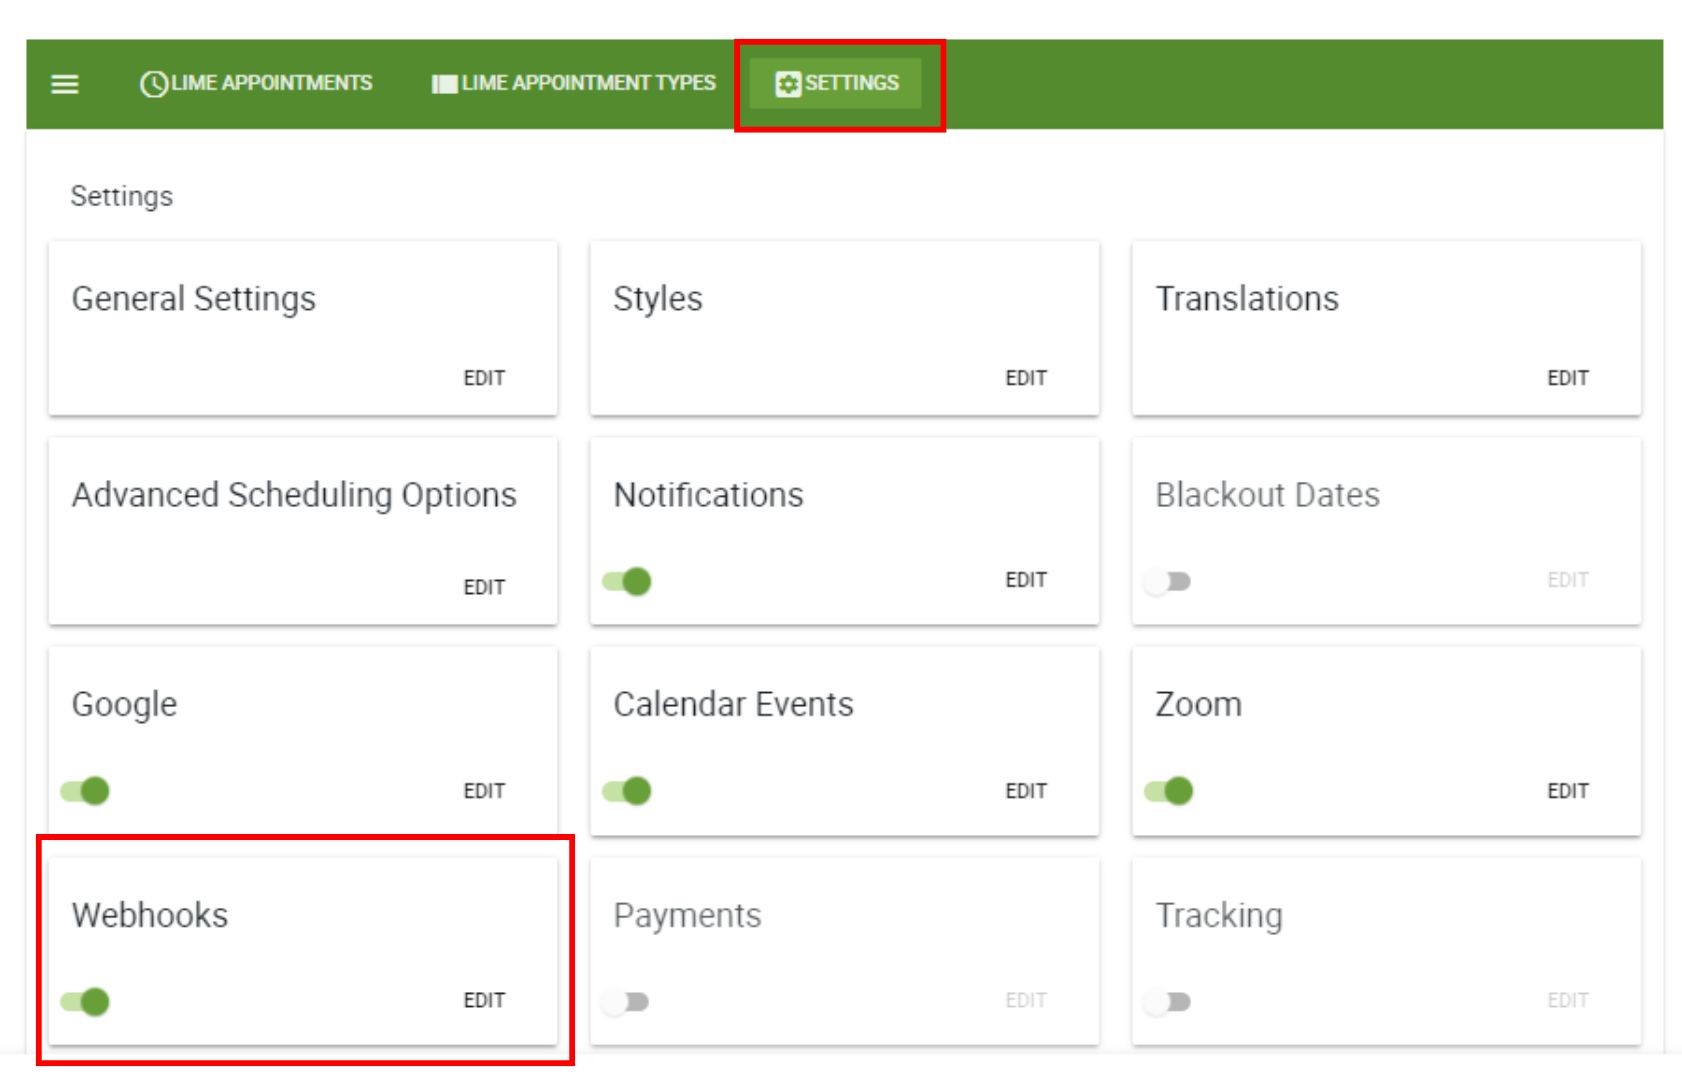
Step 3: Configure your Webhook in Lime Appointment
The Lime Appointments webhooks will automatically notify and send Zapier Appointment information depending on your chosen trigger.
- Name: An optional name for you to help keep track of your webhooks.
- Token: A unique token you can use to verify the request. To refresh the token, click the refresh arrow on the right-hand side of the token field.
- Trigger: Select which actions should trigger this webhook
- URLs: The URLs where the webhooks will be sent
- Appointment types: Select all appointment types or select certain appointment types that will trigger the webhook
Step 4: Under the URLs field, paste the Custom Webhook URL you copied from Zapier earlier.
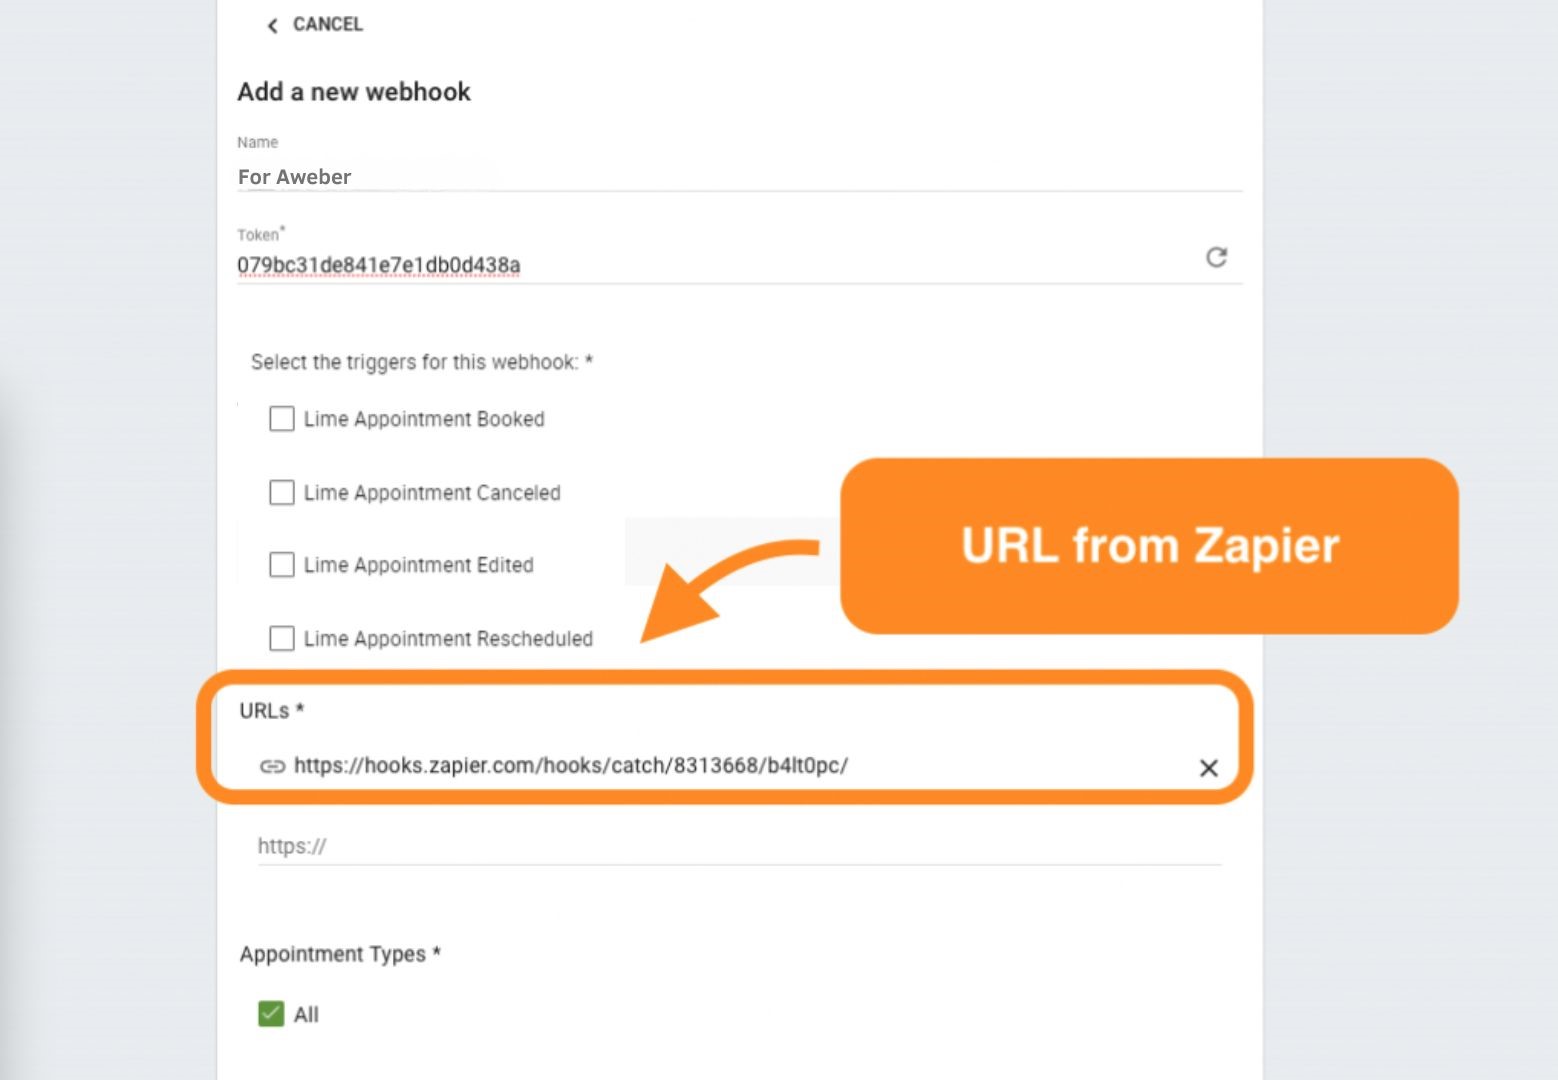
Step 5: Copy the Token, you need this for the next step.
Step 6: Click Save
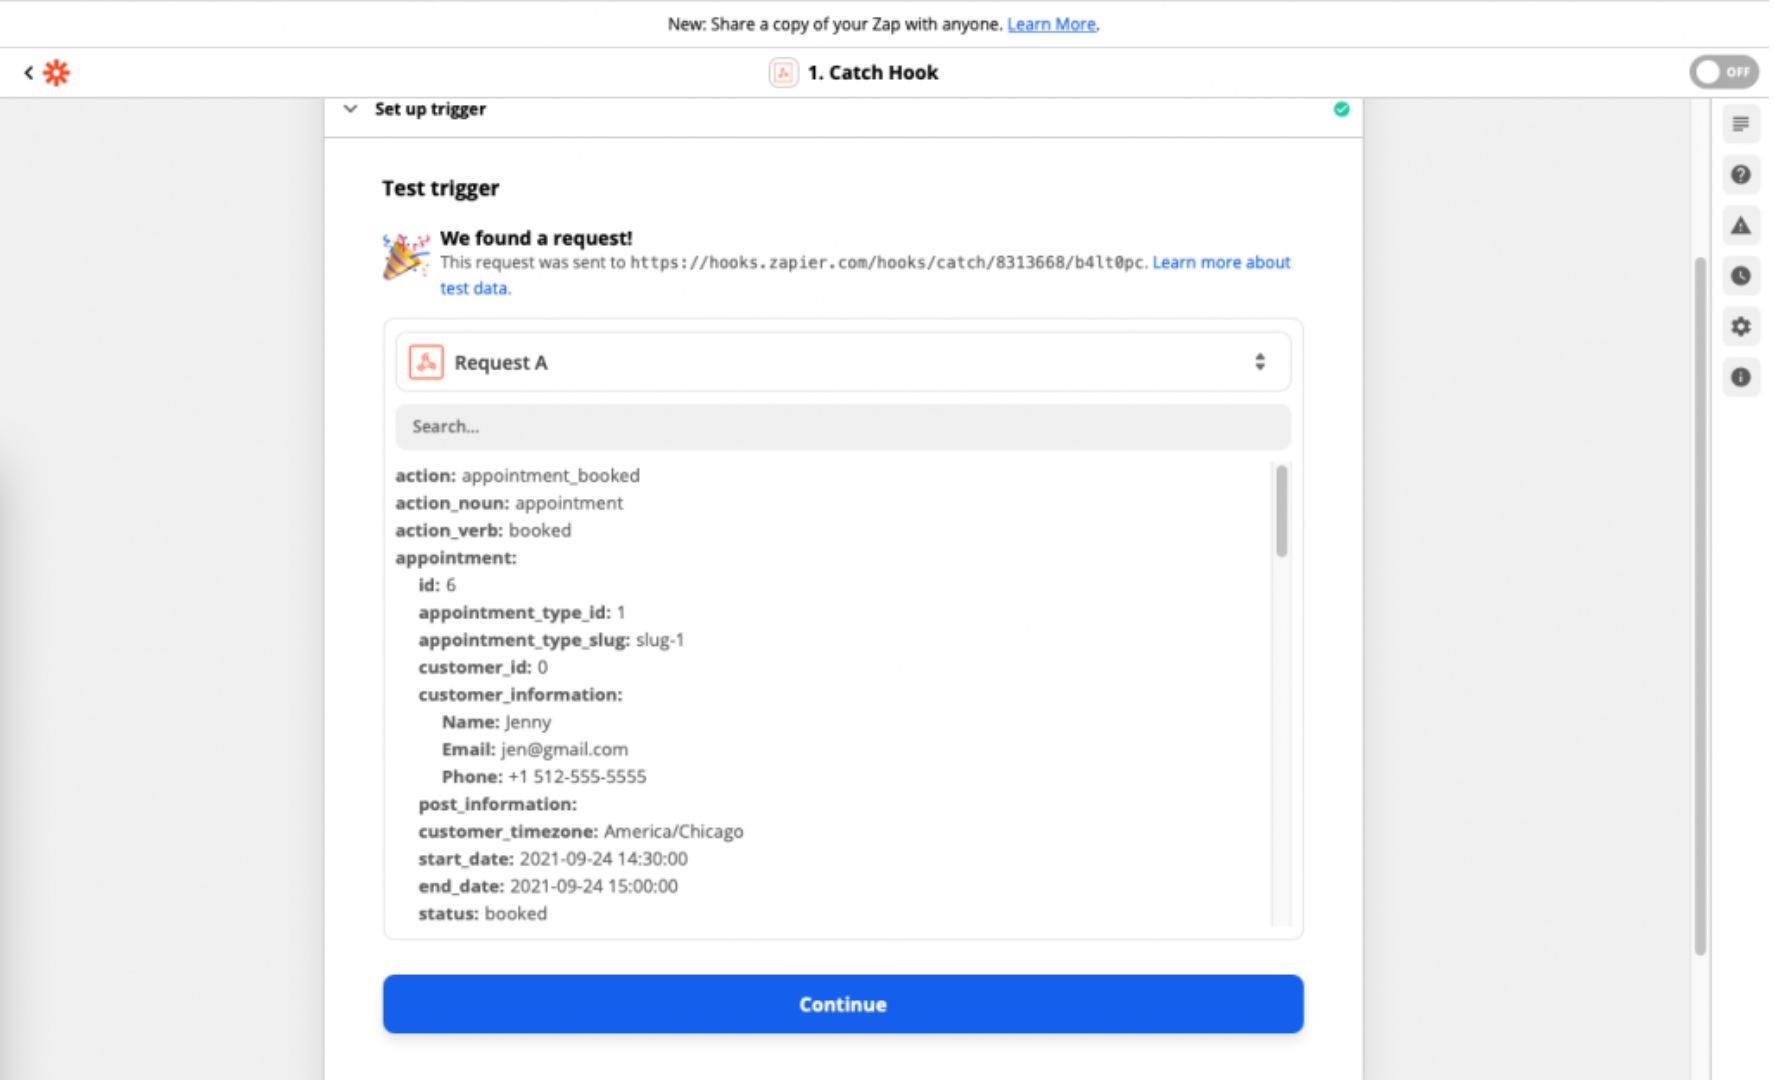
Finish Setting Up Webhook Trigger in Zapier
Step 2: Testing the Lime Appointments Trigger in Zapier
Step 3: Customize the new action in Zapier
Step 4: Double-Check Last Details
In your Zapier Dashboard, go to the Zaps page and make sure your new Zap is ON.
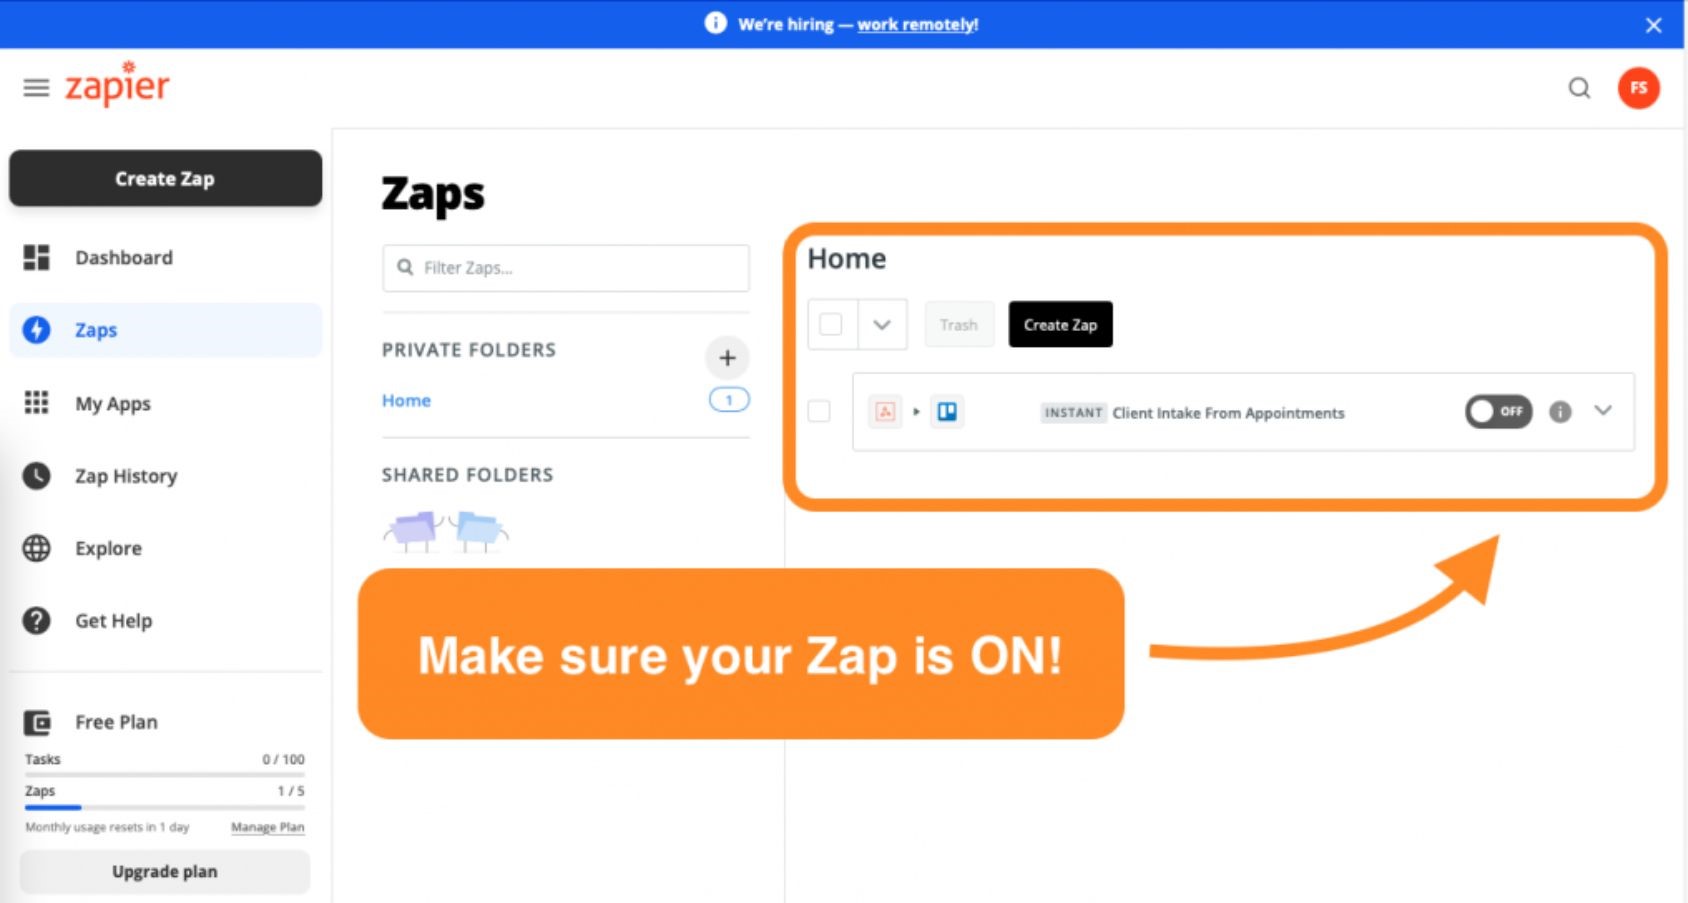
And that’s it! Now you’re ready to connect your Lime Appointments to any other application supported by Webhooks.