Using the Booking Form Module
To add a Booking Calendar, simply click on the plus-sign next to Booking to drag and drop the module into the page.
The module embeds your Booking Calendars on the page so your visitors can book an appointment. Under the Block settings on the left side of the screen, there are a couple of other settings:
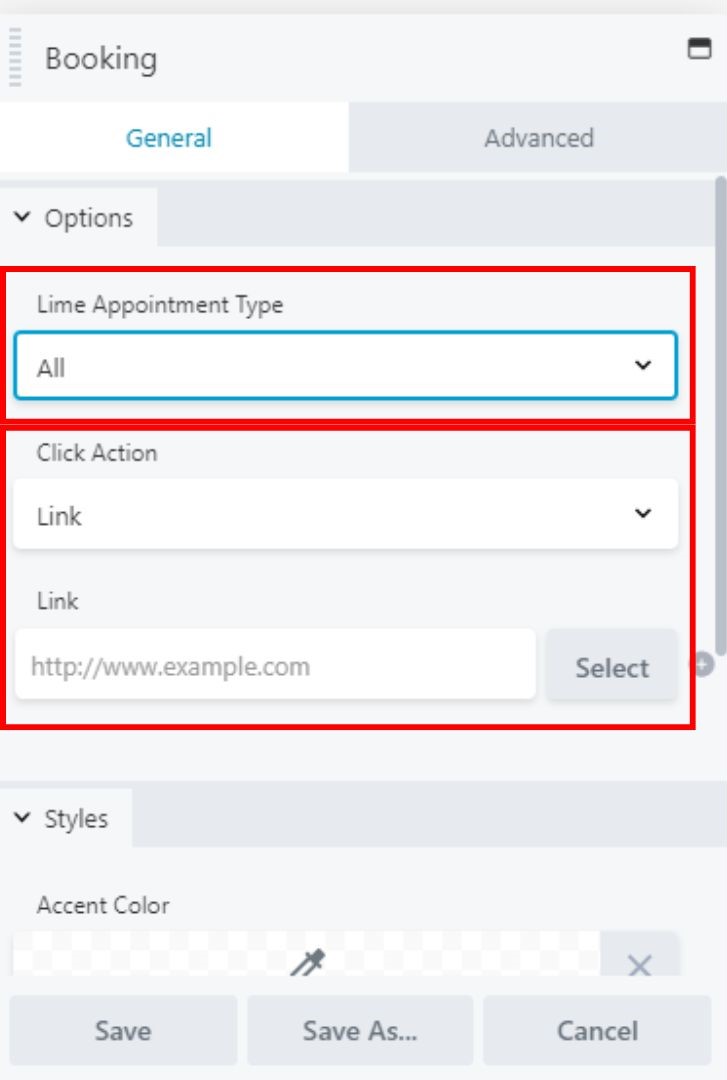
Appointment Type Setting
You can choose to show All Appointment Types, or filter to only display a single Appointment Type Calendar.
Click Action
You can set the click action to add a link to redirect user after they book or to go to the Next Funnel Step.
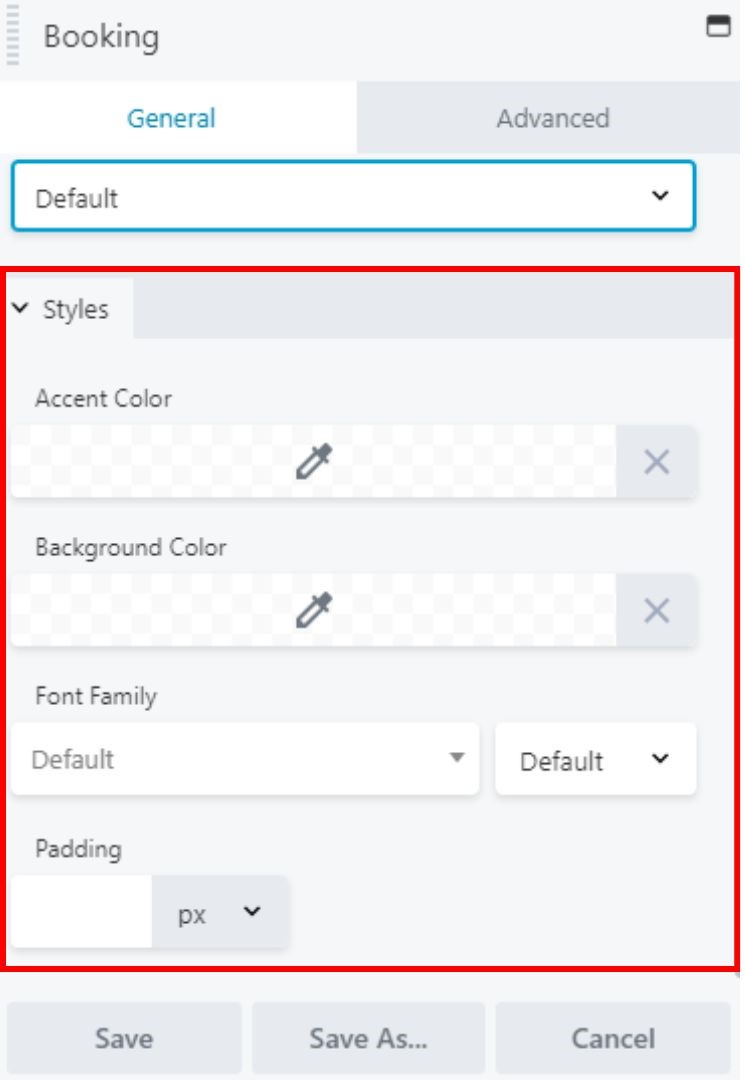
Styling Settings
Under the Styles tab, you can adjust the Accent Color, Font Family, Padding, and Background Color:
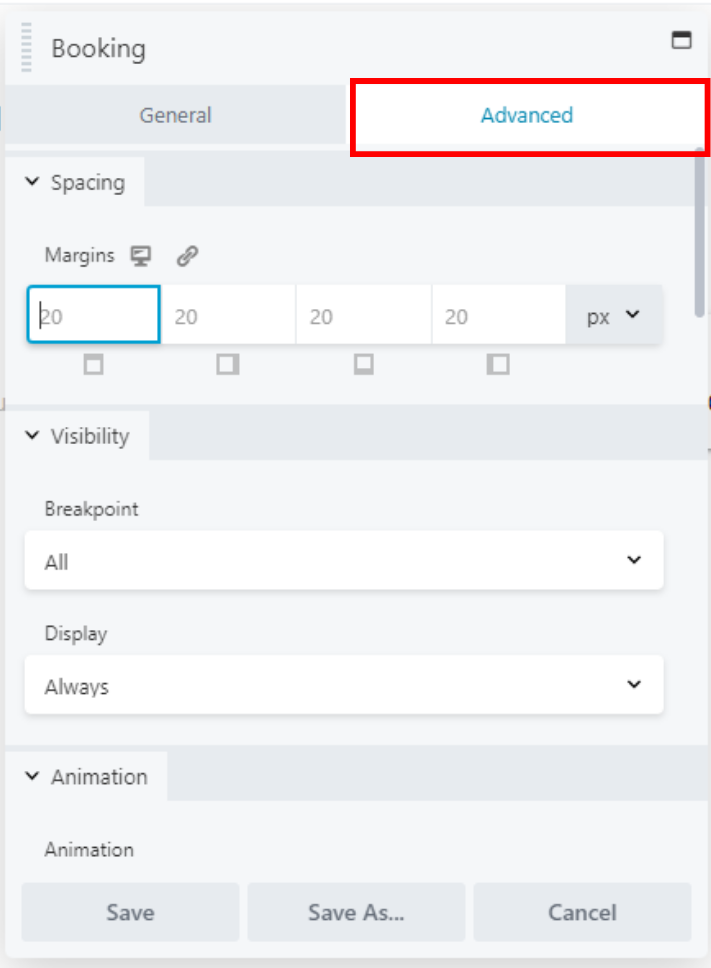
Advanced Settings
Under the Advanced Settings tab, you can adjust Spacing, Visibility, Animation, HTML, and Export/Import.
- Spacing, adjust this to align the Booking Calendar.
- Visibility, use the Breakpoint and Display drop-downs to choose conditions for when the booking calendar is visible to visitors.
- Animation, chose one of these if you’d like your visitors to see an animation of the booking calendar.
- HTML, use when you’d like to be able to use this module in separate HTML code.
- Export/Import, use this is you’d like to use the same settings or styles from the Booking Module in another Module.
Editing an Existing Booking Module
Use the Wrench icon when you hover over the Booking Calendar to bring up the floating box with settings again.
How To Redirect User To A Link Or The Next Page
Step 1: Under General > Options > Click Action
Step 2: Select Link if you want user to be redirected to a link or Next Funnel Step to let user be redirected to the next funnel page
Step 3: Once done, click Save
