How To Manually Connect Custom Domain with Lime Funnels
Want a Lime Funnels Expert to complete this step for you? Learn More Here
WARNING!!! If your custom domain is currently running a website with the URL that you want to use to connect Lime Funnels with and you do these steps, YOU WILL LOSE ACCESS TO THE CURRENT WEBSITE.
To proceed, make sure that you are ready to move your custom domain entirely over to Lime Funnels OR choose a different custom domain.
If you intend on keeping some of your content on another hosting platform and accessible via the custom domain that you're going to connect to your Lime Funnels account, you may want to consider using a Custom Subdomain and follow the instructions here to Setup a Custom Subdomain instead.
This is a 3 step process.
- You will set up your Cloudflare
- You will connect Cloudflare to Godaddy
- You will connect Cloudflare to Lime Funnels
Step-by-Step Instructions
Follow these instructions in the exact order listed below in order for your DNS to properly connect to Lime Funnels.
Please note these instructions set up your domain as domain.com (We do not recommend using www.domain.com as the instructions will be different.
However, the www version will still redirect back to your root domain.)
Step 1: Create a FREE Cloudflare account here (if you have an existing Cloudflare account, move to the next step).
FAQ: What is Cloudflare and why do I need that?
Answer: Fundamentally, Cloudflare is a large network of servers that can improve the security, performance, and reliability of anything connected to the Internet. Which is why we leverage Cloudflare's infrastructure to route your domain. That in return provides security by protecting your site from malicious activity like DDoS attacks, malicious bots, and other nefarious intrusions. It increases your Site Speed significantly as well - which means that allows you to make more SALES.
Step 2: On the Home page of Cloudflare, click the Add a Site button.
Step 3: Type in your custom domain as: yourdomain.com (without the www), and hit Add Site.
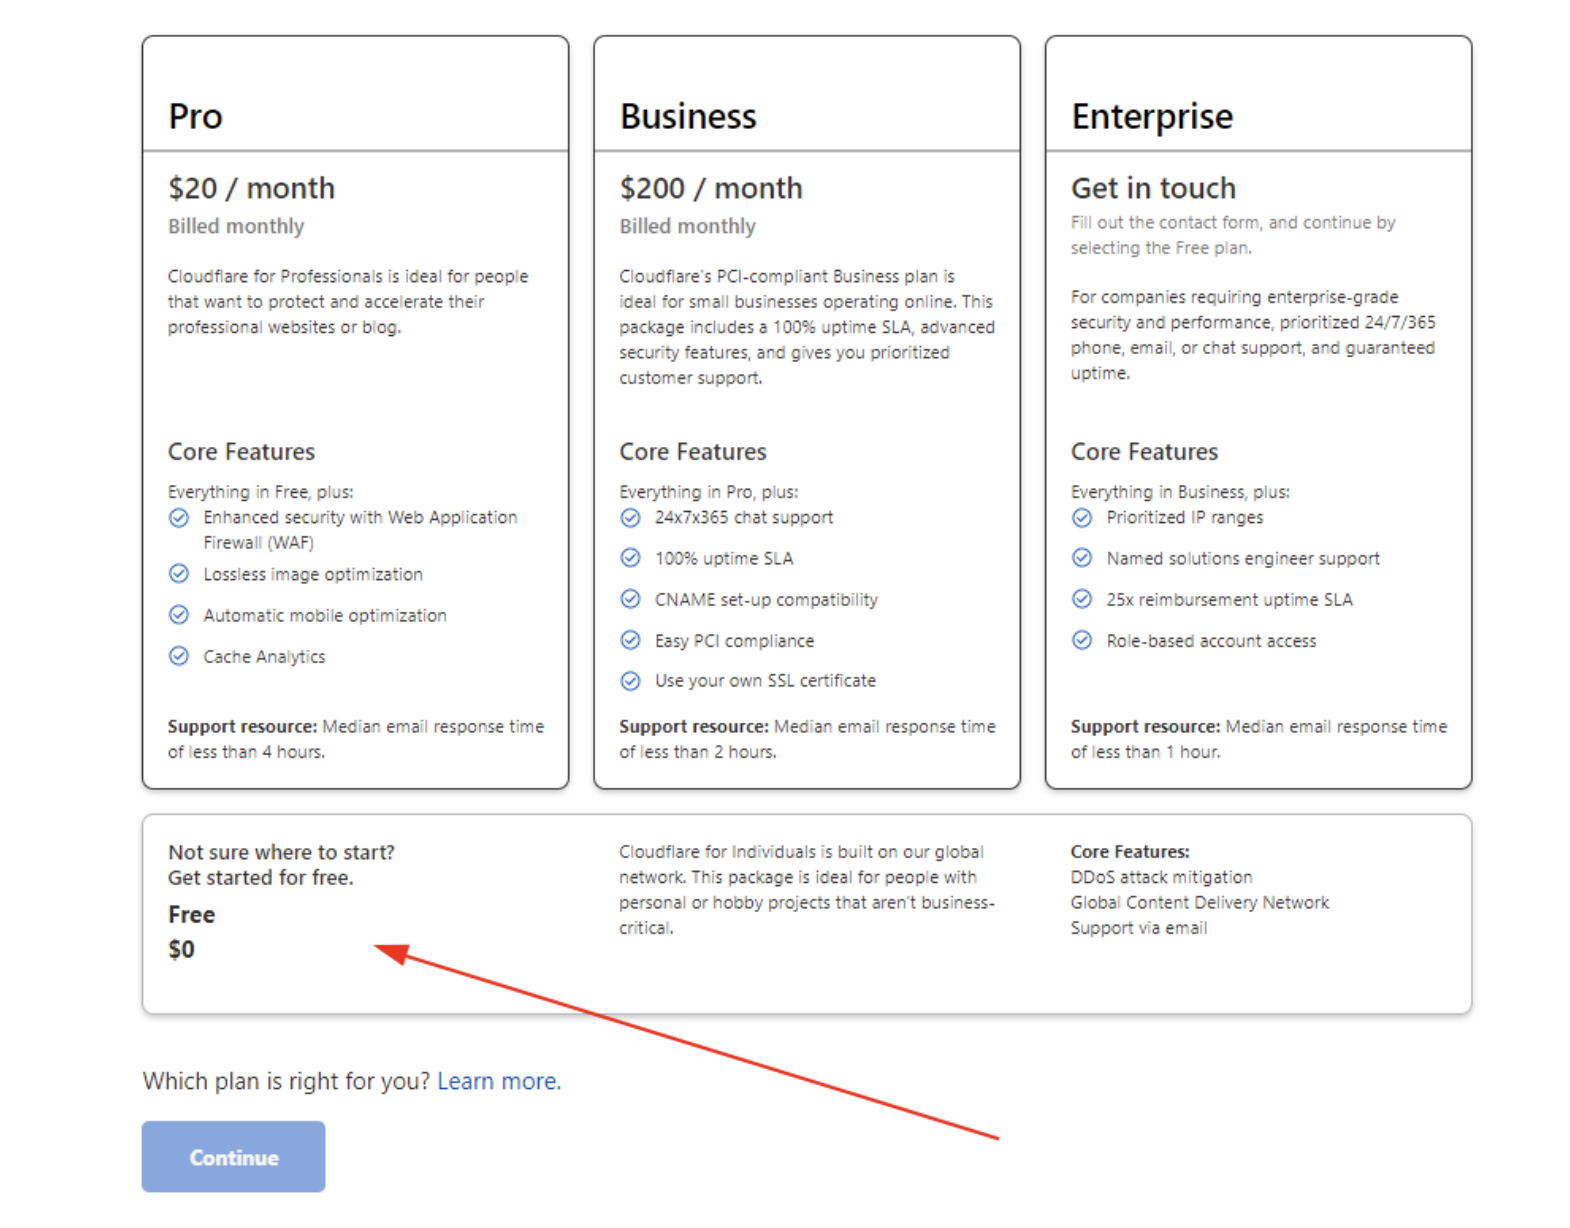
Step 4: Select the Free plan and click Confirm Plan.
NOTE: Your current DNS configuration from your domain registrar (like Go Daddy) will now be copied into your CloudFlare account.
Step 5: Add/Edit 2 A records to point to Lime Funnel's Server in your DNS settings by inputting the following and hitting Save:
Type: A
Name: @
Value: 141.193.213.20
TTL: Auto
Click: Save Record
Proxy Status: DNS Only (Grey Cloud)

Make sure you only have ONE "A record" present on your DNS settings before proceeding.
Note: The "@" symbol is used as a shortcut to your actual root domain, so you don't have to worry about the typing errors
Step 6: Add or Edit your "www" CNAME record by using the following inputs and hitting Save.
Type: CNAME
Name: www
Value: yourdomain.com
TTL: Auto
Click: Save
Proxy Status: Proxied (Orange Cloud)

Step 7: Go back to the overview page on your account where you will see recommendations section. Click it and follow it's instructions.

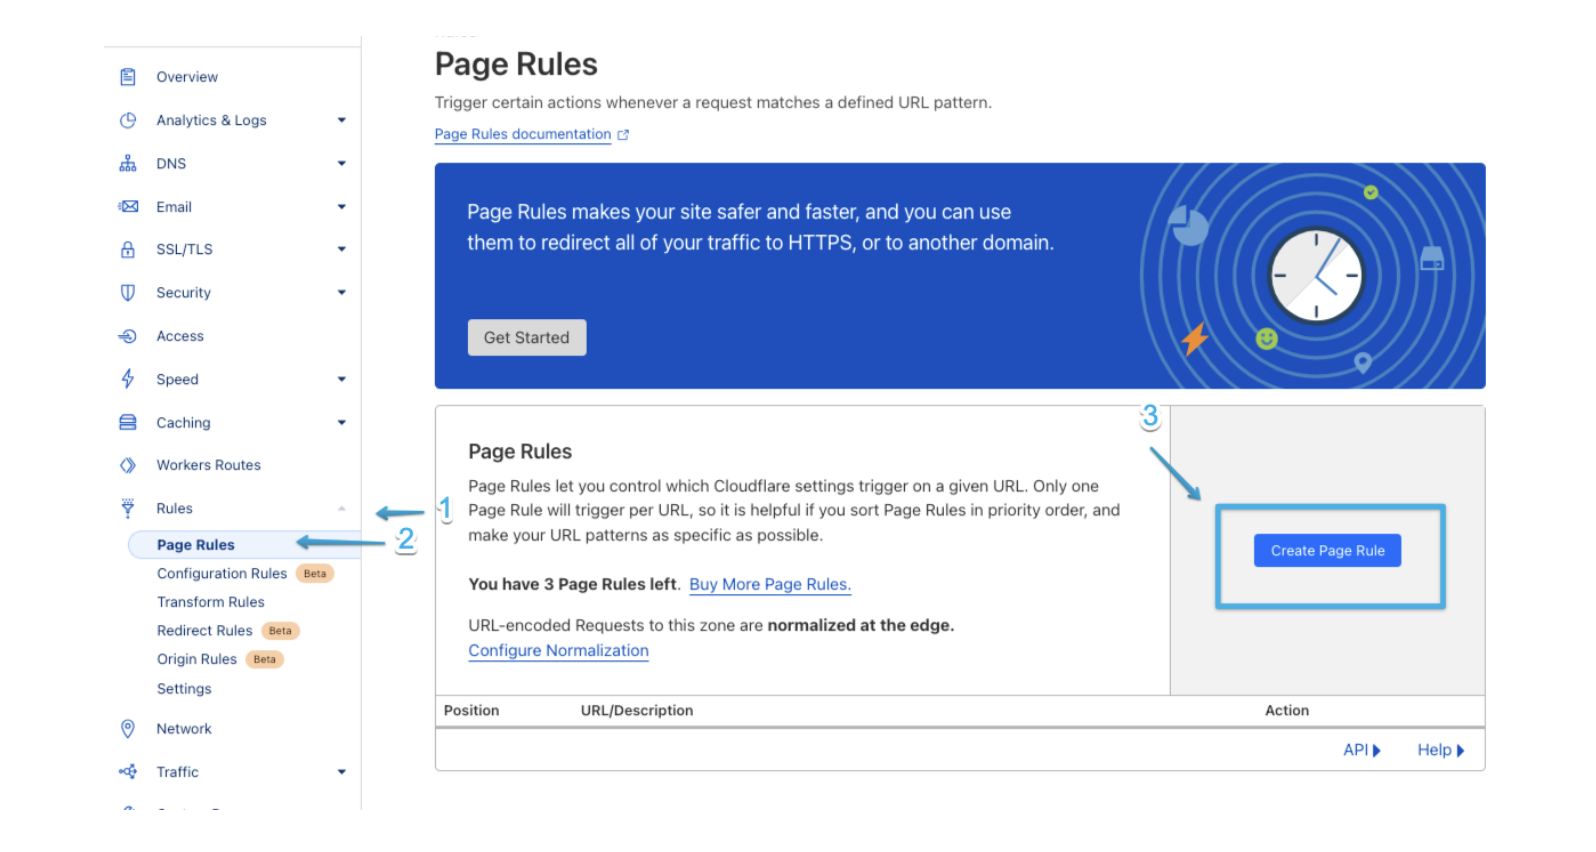
Step 8: On the left menu, go to Rules > Page Rules > Create Page Rule
Step 9: Use the following information by replacing your own custom domain name in place of "yourdomain.com".
In the first field URL (required): *www.yourdomain.com/* - you MUST use the * at the beginning and the * at the end
Then the settings are:
Pick a Setting: Forwarding URL
Select status code: 301 - Permanent Redirect
Enter destination URL: https://yourdomain.com/$2
Click "Save and Deploy Page Rule"
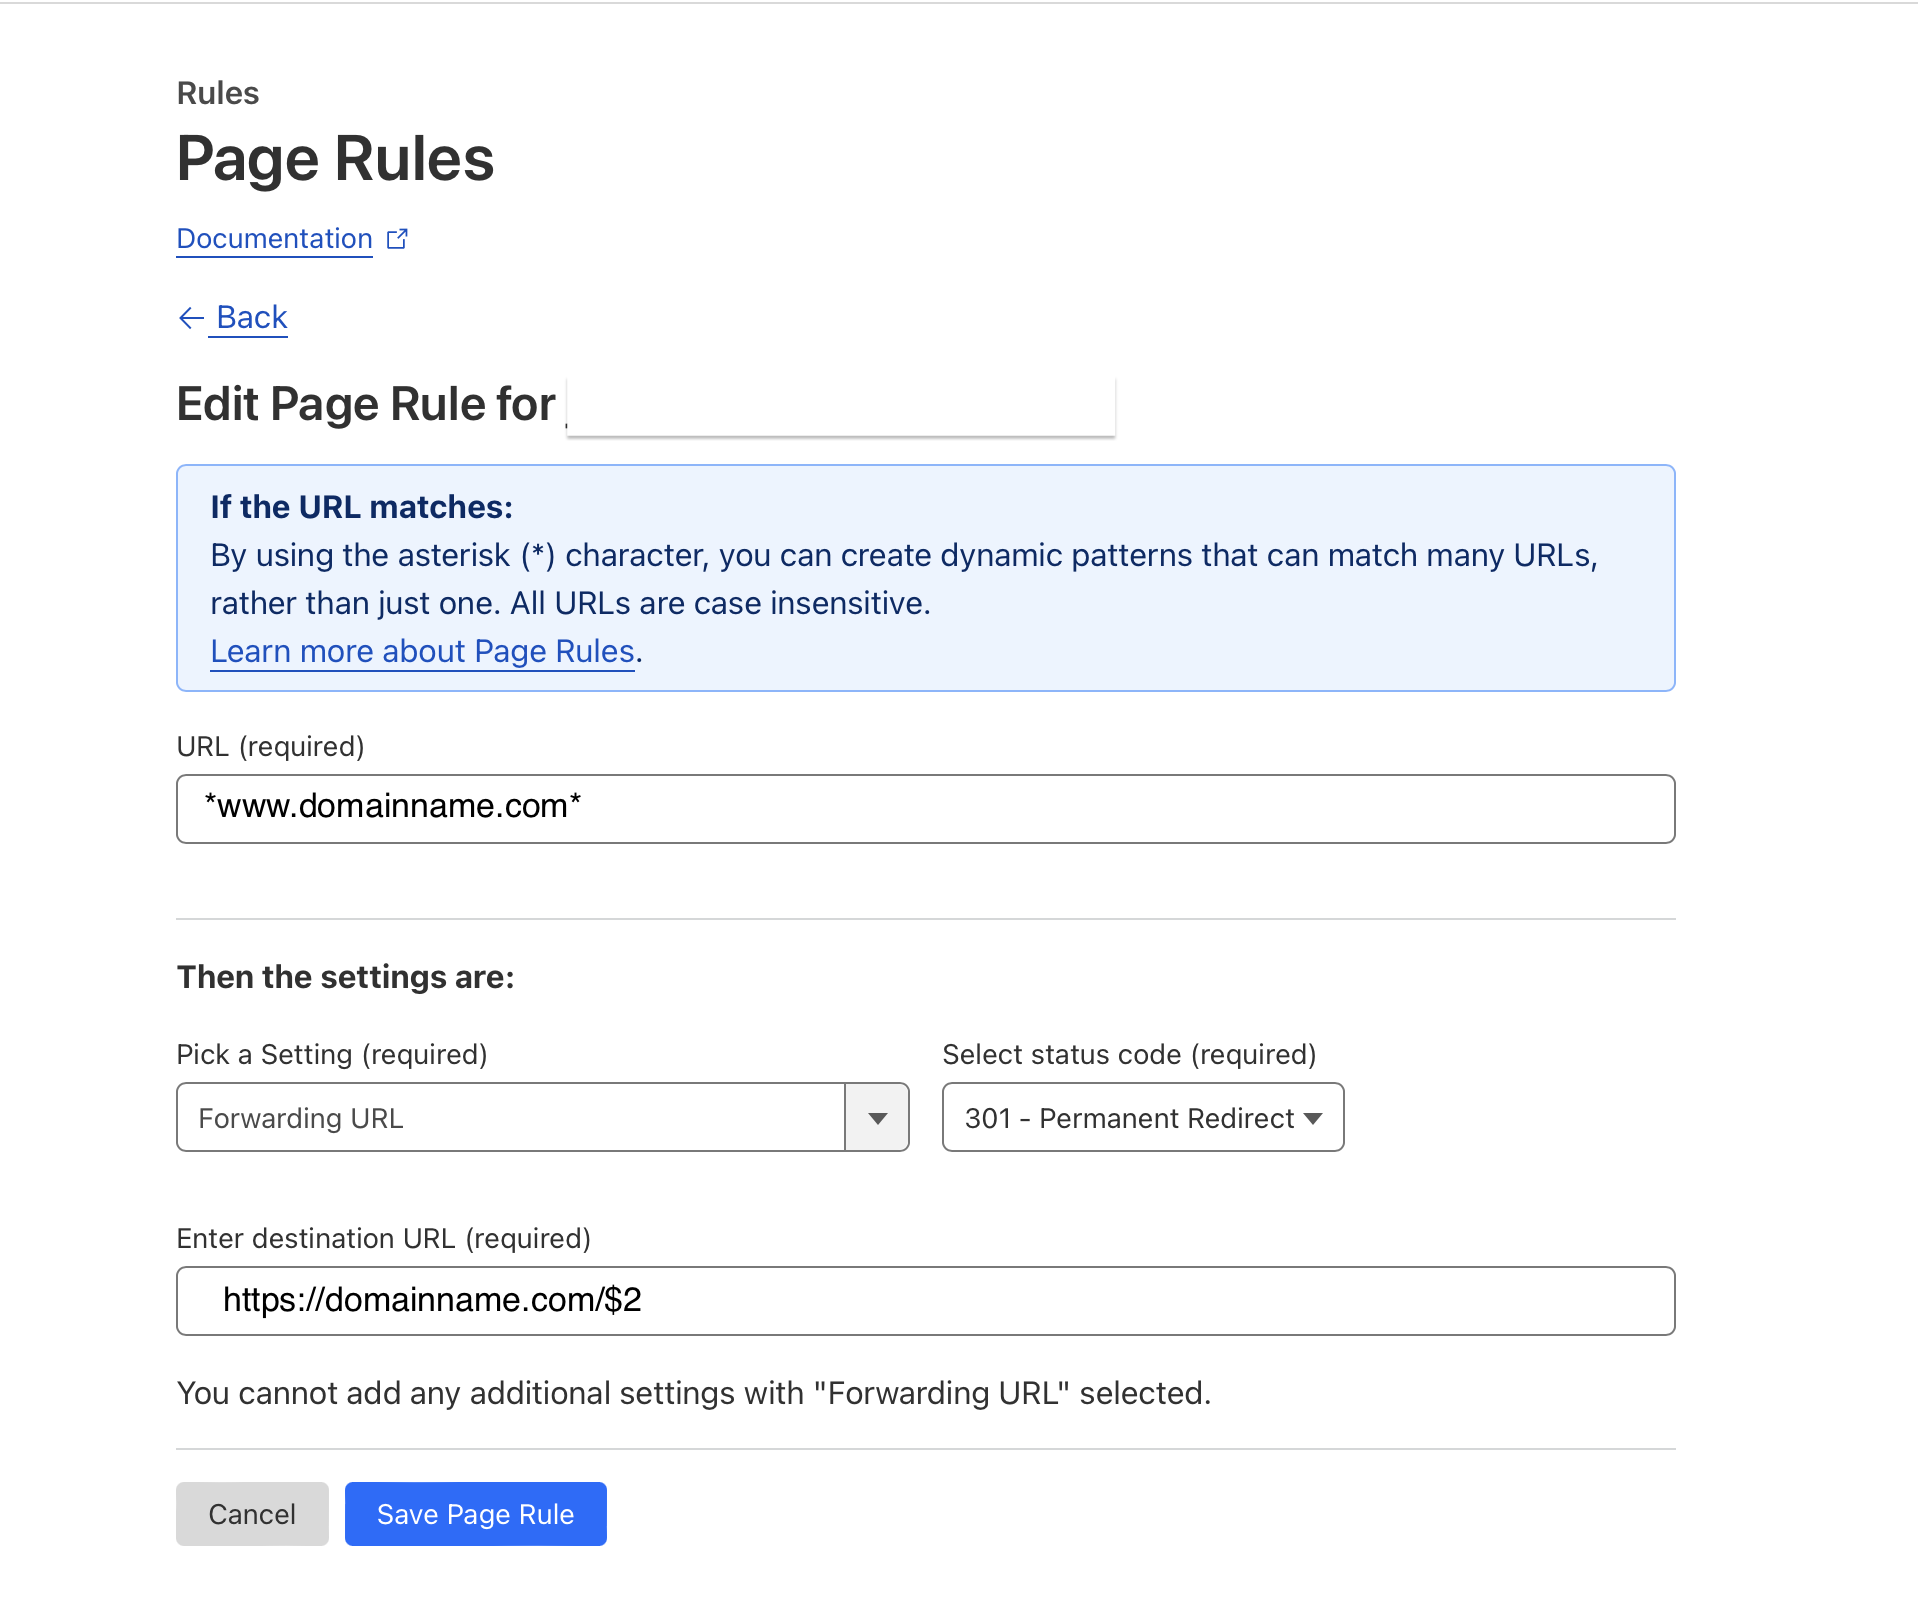
This will allow visitors to still go to your site even if they enter your site as www.yourdomain.com , which will redirect visitors back to the root domain which is yourdomain.com
Now that you've completed Step 1 to Step 10 of your custom domain connection.
Good job! That was easy right?! Let's keep going....
Connect Your Cloudflare To Your Domain Provider
Step 10: You are now ready to change your domain name servers. Go back to the Overview tab to retrieve your Cloudflare Nameservers records by navigating to the DNS settings under Quick Actions on the right hand side and click on it. This section displays your DNS records.

Scroll down to the bottom of the page where you see this...
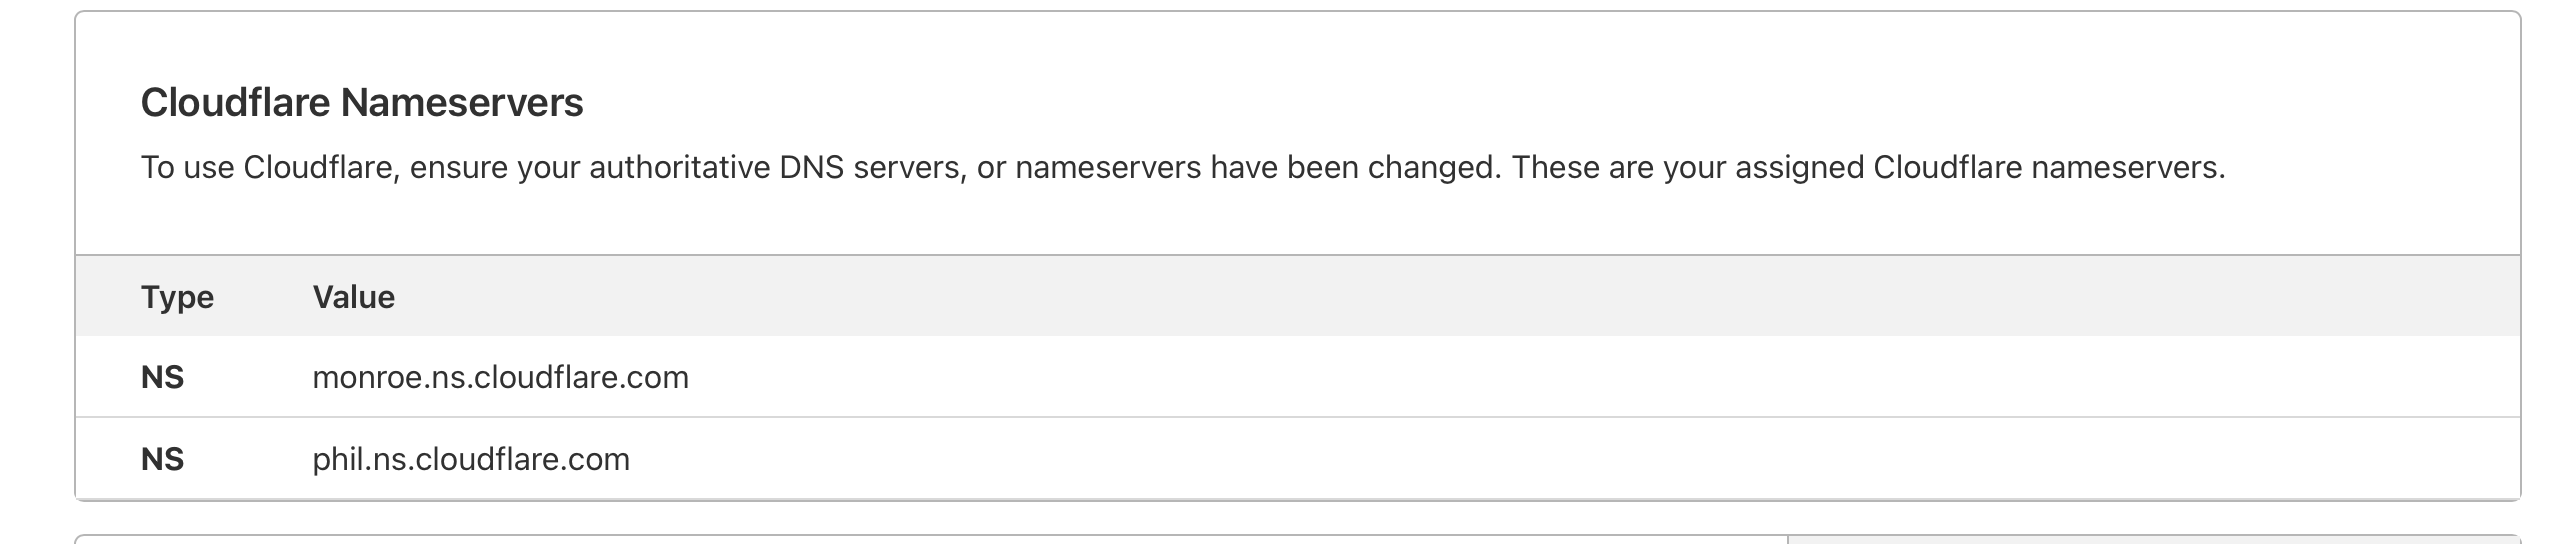
Your above values may be different than what you see in this picture. Make sure you look at your account and use your Cloudflare nameservers and put them into your domain nameserver placeholder.
Next, click HERE and then choose the domain name server that you purchased your domain from. Follow the directions from your domain server company on how to point your domain server to Cloudflare.
Connect Cloudflare With Lime Funnels
Step 11: Login to your Lime Funnels dashboard, navigate to Settings > Domain Mapping

Next you will see this in the bottom right hand corner. Click "Add Domain"

This will pop up, click "Next Step"

Step 12: Delete any existing text within the field (For existing custom domains) and place your new domain into the field.
Step 13: Type in the domain name that you purchased. Enter your domain as shown (INCLUDE https:// but DO NOT INLCUDE www)
Step 14: Click the toggle switch to make your domain primary.
Step 15: Click "Add Domain"

Check To Confirm Your DNS Is Working
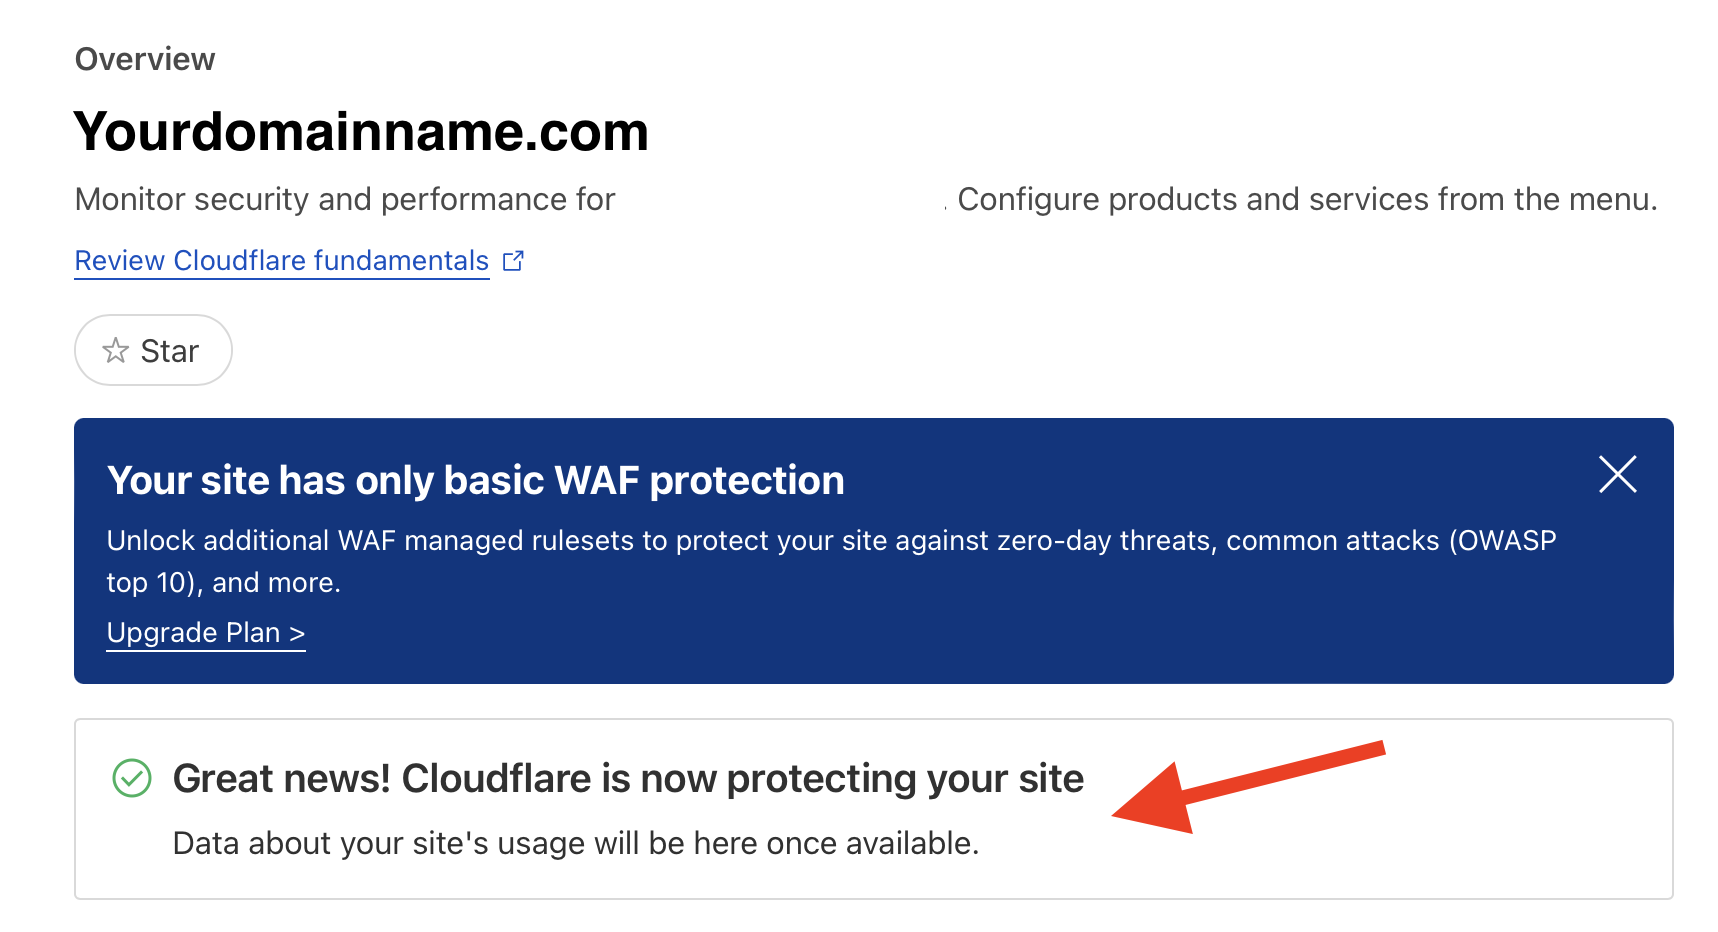
It's time to check to confirm your DNS is working!
Go back to the overview part of Cloudflare and you should see a box that says this ...
Also, DNSChecker.org is a website that provides tools for checking DNS propagation globally. It allows users to verify if their DNS records have been updated and propagated across various DNS servers worldwide. Users can check different types of DNS records, such as A, AAAA, CNAME, MX, and more, against a list of DNS servers located in multiple regions.
The site aims to help users monitor and manage their DNS records effectively, ensuring that changes are fully propagated and accessible from different locations.
Congratulations!